I shamelessly borrowed this recipe from Stonesoup, which is a fabulous Sydney-based foodie blog that I heartily recommend.

It’s so rare, though, that I come across a cake-style recipe that meets the criteria of simple, fast, tasty, and gluten-free, that I just had to share the results.

We realised a few years ago that M is somewhat gluten intolerant, which made baking much more complicated than it used to be. Often, gluten-free recipes involve 4 or 5 different types of flour, or they taste like sand – or both.

This is neither.

Gluten-free peanut butter chocolate brownies

Gluten-free peanut butter chocolate brownies - they taste even better than they look

The only changes I made to Jule’s recipe was that I used a commercial gluten-free self-raising flour, since that was what was in the cupboard, and we also included some Green & Blacks dark cooking chocolate. We also used raw sugar rather than brown sugar – again, that’s what was in the cupboard.

As you can see, they came out nicely.

Five minutes worth of prep, 30 minutes worth of baking, and thick, dense, peanut-chocolatey brownies, with the dark chocolate warm and melting in the centre. Our peanut butter had been in the fridge a little too long, so we’re going to have to bake another batch – just to check, you understand.

What are you waiting for? Recipe here.

What are you waiting for?

Quick sesame-soy omelette

Leftovers from the meal we were too tired to cook

It’s been a long day in a long week in a bad month. I was too tired to cook when I stumbled home, and M was out until late. So we decided to get takeaway.

Unfortunately, I was also too tired to remember to order takeaway. So by the time M got home,  it was late, we were both hungry, and neither of us could be bothered waiting for home delivery to show up.

So what to do?

There was brown rice in the rice cooker, some eggs & baby spinach leaves in the fridge, and the kimchi that I made back in June. Ten minutes later, we were sitting down to dinner.

Arwen’s Japanese-style omelette rice

Ingredients

4 eggs

1 tsp soy sauce

1 tsp sesame oil

Method

Break the eggs into a bowl and whisk with a fork. Stir in the soy sauce. Heat a frypan over high heat and add the sesame oil. Once you can smell the oil, add half the egg. Use the fork to move the cooked egg aside and let raw egg flow in. Once the first half is cooked, push it to the side of the pan, and cook the second half the same way. Cut into strips, and serve on the rice. I added a handful of baby spinach leaves, and a good amount of kimchi as well.

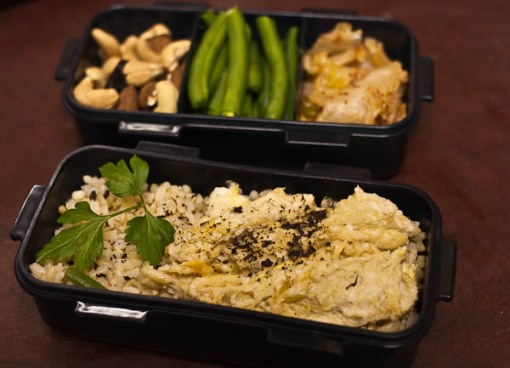
All in all, it was quick, hot, tasty, and nutritious. Of course, we were too hungry and tired to think of photographing it, so instead you have a lunch-bento  of the leftovers, still looking delicious for tomorrow.

And then I went to bed (after a quick pause to post this, of course).

Making your own pesto is much faster and easier than you'd expect

Most people don’t seem to think of pesto as a quick meal, unless you’re dolloping it out of a jar. Actually, though, fresh pesto is fast, simple, nutritious, and much, much tastier than any jar version you might have tried – even better than most restaurant versions.

I first encountered pesto from my Italian aunt, who used to babysit me until I was three years old. I then promptly forgot about it, of course, until a friend reintroduced me about sixteen or so years later. It surprised me to find out that most people think of pesto as something that comes out of jars. It’s actually very quick and easy to make at home – and so very much tastier than anything you’ll find in a jar.

There are many varients of pesto. I generally make a couple of different version, depending on what I have on hand. Basil pesto is my favourite, but you can also make very tasty versions from parsely or coriander. As well as using them on pasta, you can put dollops into soup, or on baked or grilled vegetables, into sandwiches, or as a salad dressing – or anywhere else you want a fresh tang of herbs and parmesan.

If you have a food processor, you can go from herbs on stalks to pesto in about 10 minutes, or less if you’re skipping the toasted pine nuts. If you only have a mortar and pestle, it may take a little longer – but some people think it’s even more delicious.

I’ve always read that pesto made in a mortar and pestle tastes much better than the food-processor made stuff. So just to keep things interesting, I made this pesto two ways. One in the food processor, the other in the mortar.

Basil pesto
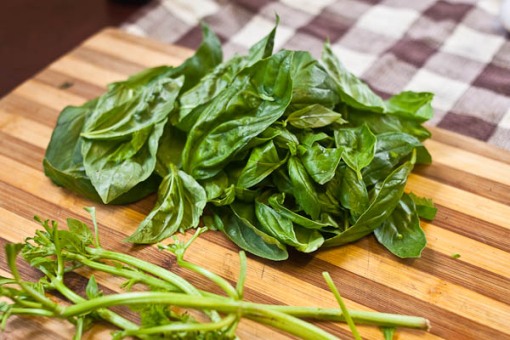
The fresher the basil, the better the pesto. Make sure you don’t use the flower heads in your basil; they’ll make your pesto bitter. And remember, all the quantities in this recipe are approximate, feel free to modify them to your taste.

Fresh basil

Make sure you leave out the flower heads, or you'll end up with bitter pesto

Ingredients
1 bunch of fresh basil
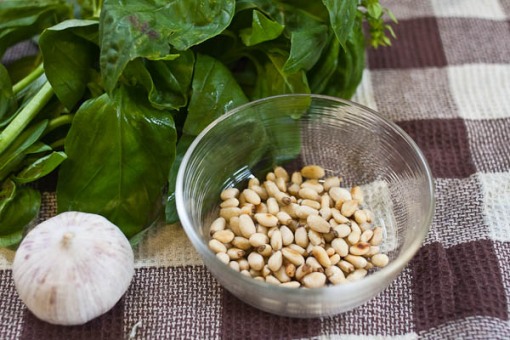
a handful of pine nuts
1/4 cup of parmesan, grated
1-2 cloves of garlic, peeled
about 2 tablespoons to 1/4 cup olive oil
Pinch of sea salt
Extra parmesan, to serve (optional)

Method
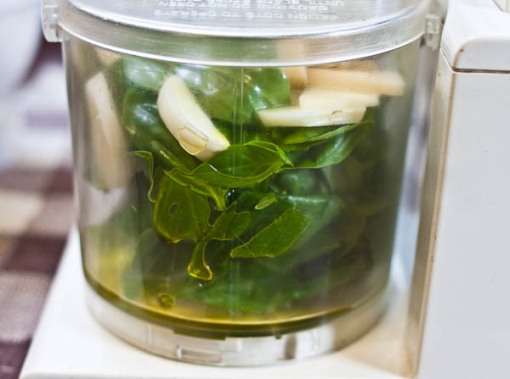
Pluck the leaves from the basil, and put in your food processor (or mortar). Toast the pinenuts in a dry frypan until they start to turn golden brown – watch them carefully as they can burn quickly. Pop them into the food processor as well, along with all the other ingredients (start with the smaller amount of olive oil). If you’re using a mortar and pestle, slice the garlic finely to make it easier to pound. Process your pesto until it becomes a very rough paste, either in a food processor or by giving it a good pounding with the pestle. Add more olive oil as needed.

Process until you get a chunky paste, adding more olive oil as needed

Serve tossed through fresh-cooked pasta, with a sprinkling of extra parmesan, if you feel like it.

Serves 2 hungry people.

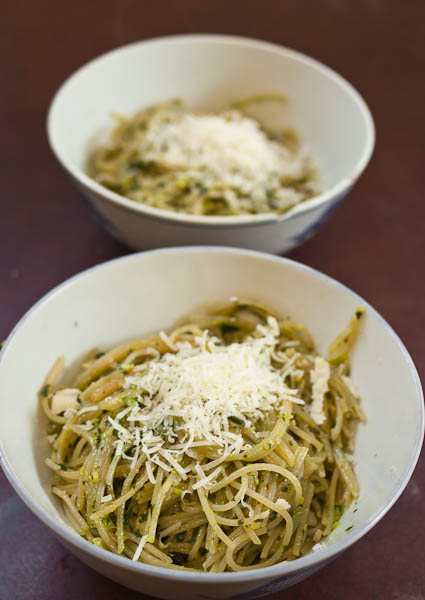
Pasta with homemade pesto

Serve with a little extra parmesan, or just as is.

So which version is tastier? M and I sampled each, and the version made in the mortar won hands down. It had a more complex flavour, with the basil coming through much more clearly.

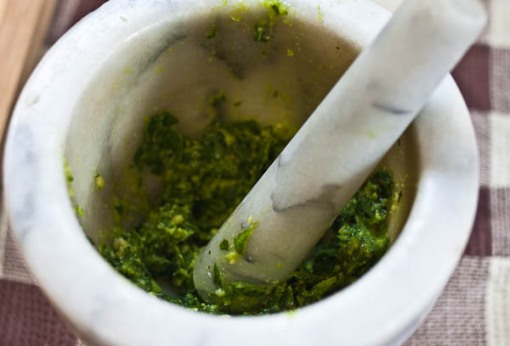
Pesto and pestle

The pesto made by hand had much more flavour and depth than the food processor batch

Does this mean I’ll be pounding my pesto from now on? I doubt it – it’s too labour-intensive for a fast meal. I may tip it into the mortar at the end, but the difference in flavour wasn’t large enough to make the extra effort worthwhile, except for extra-special occasions.

I love stirfries. They’re our default meal at home – quick, nutritious, versatile and tasty. This one is especially easy, since the tempe doesn’t need to be precooked or have anything fancy done to it.

Although I was vegetarian for a long time, I don’t much like most versions of tempe – I find most of them mushy and tasteless-yet-tangy. Nutrisoy do a tempe ‘burger’ though, which is nutty and firm and tasty – I like it a lot. And it’s available in most supermarkets, which is even better.

There’s quite a lot of ginger in this recipe, as it’s very good for my poor arthritic feet and their struggles to deal with winter. The final meal isn’t overly hot – or gingery, but feel free to adjust the amount of ginger to your taste, if you’re not as fond of it as I am.

The main thing with stir frying is to use a high heat. I’ll go into tips for successful stirfrying in another post; for the moment, just remember to have your wok (or frypan, at a pinch) hot, and keep your ingredients moving.

I also used a secret ingredient in this recipe.

When I last went to Penang, I tracked down an old fashioned soy sauce maker, one of the few remaining who brew the sauce naturally, by hand, without additives or preservatives. The place was so obscure that our driver had to call them and find out where they were hidden, but it was worth it. This stuff is ambrosial; complex and deeply flavoured (our driver left with several bottles himself, so he obviously thought it was worth the trip as well). I used some of it in the stirfry – but if you don’t happen to have artisanal, ambrosial soy sauce on hand, just use the usual stuff. It’ll still be tasty.
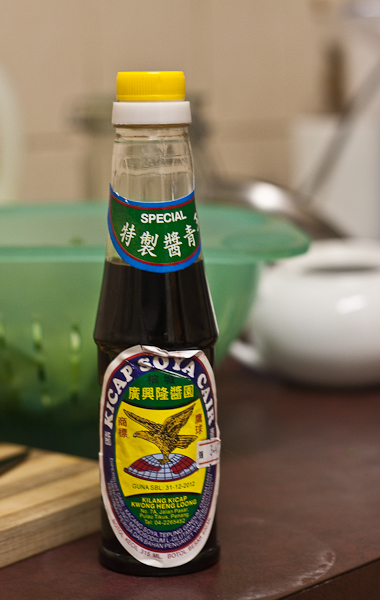
Handmade Soy sauce from Penang. Yum!

My secret special soy - not so secret now!

Tempe & Ginger Stirfry

There are a lot of different ways to vary this recipe – feel free to experiment with different vegetables or sauces.


Ingredients

2 x Nutrisoy tempe burgers (There’s three to a pack; if you both have big appetites, use all three)

1/2 capsicum (bell pepper)

2 sticks of celery

2 heads of bok choy (or other green of your choice)

2 garlic cloves (optional, but the finished stirfry certainly isn’t over garlicky)

Fresh ginger, about the length of your thumb, or a little less

1/2 tablespoon peanut oil (or olive oil if you prefer)

Soy sauce to taste

Rice, to serve

Method

Put the rice in the rice cooker, and turn it on – or start it cooking in your usual way.

Slice the bok choy into chunks, and rinse well to remove any dirt, then set aside to drain. Slice the ginger into small sticks, and peel the garlic ready for the garlic press (or mince it finely if you’re that way inclined). Cut the tempe burger into even strips, and cut the celery and capsicum into even pieces as well.
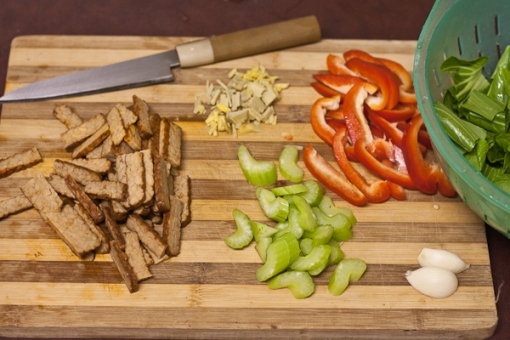
Stirfry ingredients, ready for cooking

Make sure you chop your ingredients evenly, and try to have everything ready to go before you start cooking

Put the wok on the stove at as high a heat as possible. Add the oil. When it runs across the pan like water, add the ginger and garlic, and stir well for a few seconds, until you can smell them clearly. Add the tempe burger to the wok, and cook for about a minute or two until it browns slightly. Add the celery and capsicum. You may find it helpful to add about a teaspoon of water, to steam the vegetables a little – they cook faster, and you end up using less oil.

When the celery and capsicum start to soften, and their colours are bright, add in the bok choy and stir until it’s just wilted and cooked. Turn the heat off, add soy sauce to taste, and serve.
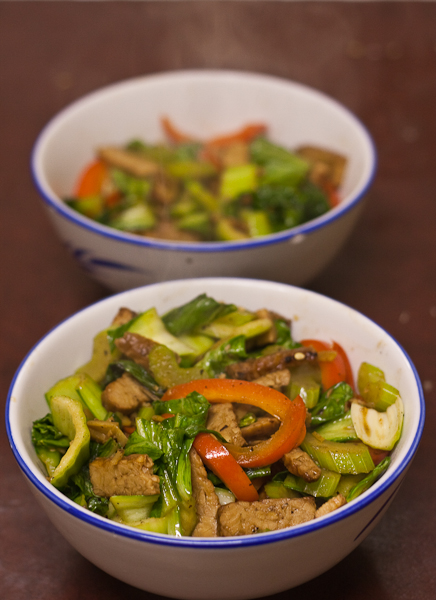
Tempe and Ginger Stirfry

Eat while fresh and hot - yum!

Enjoy!

Yes, I’m still here. It’s been a busy couple of weeks – I’ve gone from unemployment to two shiny new jobs, and am settling myself back into the routine of full-time work. As well, this cold, damp, Sydney-winter weather plays havoc with my disabilities and pain levels, making it even harder to put in the effort to cook healthy food.

As a result, I’ve been eating more takeaway than I like. M has been cooking as well, but as he travels a lot, it really is up to me to make sure I look after myself.

So, the focus for the next couple of weeks will be quick and easy meals that are still healthy and nurturing. Some of them, like last night’s baked sausages and vegetables, take next to no time to prepare, but about an hour in the oven, while others are as quick to cook as they are to put together. I’ll be posting a homemade pesto recipe in the next few days, assuming I can find some nice basil, with some more recipes to follow over the coming week.

Let me know if you have any requests!


My local sources for Asian ingredients

I’ve had a few questions about where I buy the odder ingredients I cook with, like mirin (Japanese sweet cooking sake), or kombu kelp, or even dried shiitake mushrooms.

I have a habit of wandering into Asian groceries and happily browsing for large chunks of time, but most of the ingredients I use that aren’t at my local supermarket (or in the fortnightly feedbag) come from two places, both of them in the Sydney CBD.

The first one is a lovely little Japanese grocery store hidden behind Woolworths at town hall. It’s called Conveni8, and it’s located an arcade on Pitt St at Town Hall, just down from Park Street.

They stock just about every Japanese food ingredient you can think of, and a wide range of Japanese sweets (including my favourite chocolate bar ‘Crunky’, and green tea & cherry blossom KitKats).

Anything I don’t get from Conveni8 usually comes from Thai Kee supermarket in Chinatown’s Market City shopping centre. This place has a fabulous range of ingredients from Chinese cuisine, Japanese, Thai, Malaysian, Korean – you name it. They also have a well-stocked freezer section full of tasty dumplings, and a good kitchen implement section (as well as some of the largest mortars & pestles I’ve ever seen).

They even have an impressive range of vegetarian ingredients, from vegetarian fish maw to two different kinds of vegetarian shark’s fin. There’s some vegetarian pork floss sitting in my cupboard at the moment from Thai Kee, which I haven’t yet had the courage to sample. (If you do go there for vegetarian foodstuffs, make sure you check out the freezer section as well as the general food isles – they have two full freezer cabinets jammed full of vegetarian tasties.)

Where do you go for the stuff you don’t find in your local supermarket? Share it with us all!

So, what happened to the home-made kimchi. I said in my last post to give your kimchi about two to three days to ferment, before you popped it in the fridge. Of course, I then went out of town, leaving my kimchi sitting happily on the bench, and came back five days later.

And whaddaya know, it’s delicious.

Fresh, sour, tasty kimchi ready for dinner tonight

It’s salty, hot and bitey from the chilli, tangy and sour from the fermentation, and delicious. Next time, I’ll reduce the salt slightly – it’s a little saltier than I’d prefer, but we’re going to have no problems chowing our way through this batch. In fact, we’ll be eating this lot tonight.

Did anyone else try the kimchi recipe yet? How did it turn out?