If you’ve ever eaten at a Korean restaurant, chances are you’ve eaten kimchi, the fermented chilli and Chinese cabbage pickle that tastes so, so much better than that description makes it sound. I love kimchi – I’ve been known to eat it by the spoonful. And, surprisingly enough, it’s pretty easy to make – well, this version is, anyway.

I’ve also discovered that some people haven’t encountered Chinese cabbage, or wombok, the main ingredient in most kimchi. It’s one of my favourite greens. It’s light and crisp, without the heavy sulfur tang of most Western varieties, but more robust than lettuce. It also lasts much better in the fridge than other Asian greens like bok choy or gai lan, and it cooks quickly in dishes like stirfries or stews. Chinese cabbage is one of the traditional ingredients in Japanese hotpots, too. For any Americans reading along, it seems to be known as Napa cabbage over there.

But if you’ve been staring at the remains of a Chinese cabbage in your fridge, wondering what on earth you’re going to do with it, tasty spicy bitey kimchi is a damn good option.

There are many, many different variations on kimchi. From ones that use different vegetables as the base, like daikon radish, or various greens, to different flavourings, like fish or soy sauce, or even fresh oysters. I like mine fairly basic, and didn’t happen to have any oysters lying around the house, so here is my version.

Arwen’s Simple Kimchi recipe

Korean chilli powder is normally a little milder than most others. I couldn’t find any when I went hunting through Asian supermarkets, so I just used normal chilli flakes, whizzed in my spice grinder until they were mostly powdered. If you’re using Korean powder, you may want to up your chilli quantity a little – or just leave it as it is for a slightly milder pickle.

The word ‘shmoosh’ appears frequently throughout this recipe. In case it’s not clear, I mean ‘give it a good squeezy mix with your hands’.

Ingredients

1/2 Chinese cabbage, cut into rough pieces

1/4 cup salt (don’t worry; it isn’t all ending up in the finished kimchi)

water

1/4 cup Korean chilli powder (or any other chilli powder)

3 spring onions, roughly sliced (optional)

2 teaspoons grated fresh ginger

2 teaspoons crushed fresh garlic (or 2 large cloves)

Method

Chopped Chinese Cabbage

Chopped cabbage, ready for brining

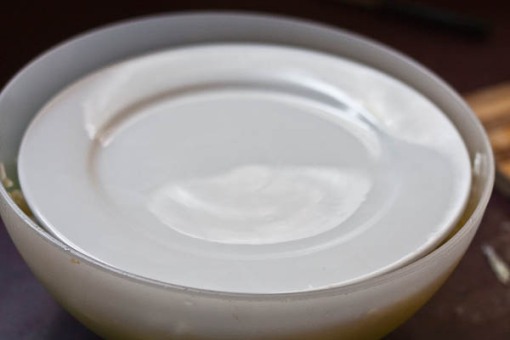
Pop the chopped Chinese cabbage into a non-metal bowl big enough to hold it comfortably. Dissolve the salt into about 2 cups of warm water, then pour the salty water over the cabbage. With clean hands, give the cabbage a good mix to make sure it’s all covered with the salt water, then pop a weight on top (I used a dinner plate) and leave it overnight (or for at least 4 hours) to brine.
Cabbage in brine

I used a dinner plate as a weight for my brining cabbage

The next day, drain the brine off the cabbage, and rinse it well, preferably two or three times. Let it drain. Mix the chilli powder, garlic, and ginger with enough water to make a paste. Pop your cabbage pack in its bowl, and add the chilli paste and the chopped spring onions.

Pre-shmooshed kimchi

Before shmooshing

Now put some food-safe gloves on! This is important – you’re going to be doing more shmoosing, and grinding chilli into your skin burns, even if you don’t accidentally wipe your face with a chilli-hand. I used disposable latex gloves.

Shmooshing the kimchi

Give it a good mix and squeeze - and I mean it about the gloves!

Once you’re gloved up, mix the kimchi up well, giving it a good shmoosh as you go, to further break the cell walls in the cabbage and help the chilli marinade penetrate it.

Kimchi; after shmoosing

And after shmooshing.

When mixed well, put the kimchi into your container (make sure you wash it well first!). Leave it out for 1 – 2 days to start to ferment, then pop it into the fridge. The longer you leave it, the more sour your final kimchi will be. You can eat it any time after it’s ready for the fridge;  and it should last several months.

Note: it’s best to use a glass or ceramic jar to store your kimchi in, as the chilli can stain plastic. I had neither on hand, so I’ve resigned myself to a red-stained container.

Finished Kimchi

The finished kimchi. Over the next few days, the liquid will go red, and the kimchi will get tastier and tastier.

I’ll make sure I post pictures of the final kimchi when it’s ready to eat, and hopefully a recipe as well.

Back at the end of May, I made roast duck. Since I dislike wasting leftovers (and since I don’t roast meat often enough to get sick of saving the carcass), I made stock out of the bones the next day – and then a Vietnamese-style soup from the broth. There wasn’t enough duck left over to add meat to the soup, but the flavour from the stock came through clearly enough to make it deliciously full of unami anyway.

The soup turned out well – I ended up bowls of warm, fragrant soup, redolent of star anise, rich duck, lemon, and a subtle hint of cinnamon. Lovely on a cold winter’s night!

Duck stock

Any leftover stock can be frozen to use later – it’s probably worth concentrating it as much as you can, so it takes up less space in your freezer. You can freeze it in icecube trays to get little cubes of stock to add flavour to foods, or just freeze it in a lump.

Ingredients

1 roast duck carcass, along with reserved wingtips & neck bone

2-3 sticks of celery, roughly chopped

1 onion, also roughly chopped

1 carrot, yet again roughly chopped

3 shiitake mushrooms  – I had fresh ones on hand, but dried would be just as good or better. Tear them into chunks.

1 small piece of kombu (Dried kelp. This is optional, but it does add to the umami)

Tops of two spring onions

Piece of cinnamon bark

2 star anise

3-4 good slices of fresh ginger

About a teaspoon of peppercorns (fresh or dried – I happened to have fresh ones)

About 10 ripe cherry tomatoes (because they needed using – but they also add a richness to the stock)

Making duck stock

Pop all the ingredients for your stock into a big pot, cover with cold water, then cook for about an hour and a half

Method

Throw all in pot, cover with cold water (it’s very important that you use cold water – it helps bring all the flavours out of your ingredients), bring slowly to simmer. Cook on a low heat for about an hour & a half to two hours. If necessary, remove all the solid ingredients and reduce the stock to concentrate the flavours, or just season to taste.

Vietnamese-style duck broth

This soup may look complicated, but it’s actually very quick and  straightforward, if you have the stock already made. You can substitute the vegetables and meat for whatever you have in the cupboard, so it’s a good way of using up your excess veg, as well.

Ingredients

Duck stock – about 4 cups per person.

4 shiitake mushrooms

tops of 1-2 spring onions, cut into rounds

A handful of enotake mushrooms, bottom piece removed.

1 carrot, finely sliced

Noodles of your choice – I used sweet potato noodles, but rice noodles or wheat noodles will work too)

Handful of green beans, cut into bite-sized pieces

Leftover duck meat, if you have any, or thinly-sliced beef, or tofu (we used vegetarian burdock balls, since they were in the freezer)

1 lemon, sliced into quarters

Fresh mint (optional)

Soy sauce and fresh chilli slices, as dipping sauce

Method

Warm the stock until just boiling. Add the mushrooms, carrot, beans, and leftover meat or substitute to the broth, and cook ’til just tender. Pour boiling water over the noodles, and add to the soup to finish cooking.

Serve with lemon slices and fresh mint, and soy and sliced chilli on the side.

Serves 2

Vietnamese-style duck soup

Duck soup, taken on the couch just before eating. There almost wasn't a finished picture of this - it smelt so good I very nearly just dug in!

I’m still finding the knack for stock. I’m not sure if it’s just that commercial stocks are filled with additives and a half-tonne of salt to make them enticing, but many of the stocks I’ve made previously have seemed a bit insipid – vegetable ones especially. This one worked out well, especially once I’d turned it into soup, but I’m still working on getting the full flavour of my ingredients into the stocks. Any suggestions gladly accepted!

In other news, my sourdough adventures continue. I made a batch of spelt & wholemeal bread last week, and it turned out surprisingly well! Embarrassingly enough, it’s the first loaf I’ve made that actually came out of its banneton after rising without getting stuck and pulled around, and it looks lovely and rustically cute. Once I cut into it, too, it had a nice crumb, with reasonable sized air holes in it, and a fine, translucent character to the bread. It tastes good, too – quite mild, for a sourdough, since I used my dry starter, and it was recently fed, but still with that complex sweetness and flavour depth of a good sourdough.

Spelt & Wholemeal Sourdough

Cooling from the oven. It looks so tasty!

I think this one worked partly because it’s a slightly drier dough than I usually work with, and partly because the banneton is finally getting seasoned with the right flour. I still have a long way to go, but it’s very encouraging!

Rustic Sourdough

I'm definitely getting better at my baking

As I promised last week, here’s another recipe for anyone still trying to work out what one does with daikon, other than wave them around the kitchen, in all their long radishy glory. I made this for dinner last night, along with a hot & sour stir fry of tofu, eggplant and capsicum, and some quick daikon & carrot pickles. It was well tasty!

The sauce for this dish is a sweetened miso sauce, known in Japan as dengaku miso. It keeps indefinitely in the fridge, and is traditionally used for Japanese country-style cooking, on top of eggplant or tofu. Because it’s cooked, the healthy miso cultures will no longer be viable, so I usually stir a little bit of fresh miso back into it when I put it in the fridge, in the hopes that it will recolonise. I have no idea if it actually works, but it can’t hurt.

Braised Daikon with Sweet Miso

The rice is there to soak up the bitterness of the daikon, resulting in a smooth, tender vegetable base for the sweet miso to shine through. The quantities of mirin and sugar aren’t a typo, you really do want almost as much sugar and mirin as miso.

Ingredients

1 daikon radish

1 tablespoon of rice (any type except basmati or jasmine)

1 largish piece of kombu seaweed (optional)

2 tablespoons of red miso

1.5 tablespoons raw sugar

1.5 tablespoons mirin (sweet Japanese cooking wine)

Peeled daikon radish chunks

Peeled daikon chunks, ready for simmering

Method

Peel the daikon and cut into 4 chunks. Put the chunks and the rice into a saucepan and cover with cold water. Bring to the boil over medium to high heat, then reduce heat to medium and simmer until daikon is tender when poked with a skewer or knifepoint; this will probably take about 20 minutes. Drain and discard the rice, and rinse the daikon chunks under cold water until cool.

While the daikon is cooking, make the miso sauce. Mix the miso, sugar and mirin together, then cook over medium heat until it starts to bubble, then reduce the heat to as low as possible, and stir constantly until the mixture is thick – you want it about as thick as your original miso. Turn the heat off and let the sauce sit while you finish the daikon.

Daikon radish & kombu seaweed

The braised daikon chunks soaking with kombu seaweed. That's the sweet miso sauce behind it, too.

Wash the saucepan you cooked the daikon in, then pop in the kombu and radish chunks, and cover with cold water again. Heat the pot to almost boiling point, then turn the heat off and let it sit for about 15 minutes to absorb the kombu flavour. If you don’t happen to keep dried seaweed in your kitchen, you can substitute with instant dashi (Japanese stock), or just use plain water. The seaweed does give it a lovely subtle flavour, though. I save the seaweed flavoured water afterwards, too, to use as a stock base.

While the daikon is sitting around, I usually stirfry whatever I’m serving along with it.

To serve, stand 2 chunks on your plate and top with a generous teaspoon of the miso. Add in whatever else you’re serving for your tasty dinner. Eat, making happy noises.

Braised daikon with sweet miso, and hot & sour stirfry

Serves 2 people as a side dish.

Just to round off the daikon posts, here is the daikon I started drying in last week’s daikon post. As you can see, it’s shriveled up and dried nicely, and is ready to be popped into a jar until the next time I make an Asian-style hotpot. So if you’re really stuck for things to do with your radish, you can always delay having to make up your mind!


Dried daikon radish

Last week's daikon slices, now completely dry and ready to put away

One of the meats in the last Feedbag was some diced goat. I haven’t actually cooked diced goat, but I’ve eaten goat curry both locally and overseas, and loved it each time, so it was easy enough to work out what to do with it.

I spent a little while drooling through various cookbooks. I ended up going with a recipe from my current favourite Indian cookbook, Mangoes and Curry Leaves, by Jeffrey Alford & Naomi Duguid. This is the sort of cookbook I want to write – part cookbook, part travelogue, part photo book, and full of very authentic, and very tasty recipes. The recipe I ended up using for my precious diced goat was a ginger & coconut lamb curry from Southern India. It’s full of tasty spices like toasted coriander seeds, cinnamon, turmeric, and lots of ginger, while still fairly easy to prepare. And best of all, I had all the necessary ingredients in my cupboard.

I won’t give you the whole recipe here, since I used the cookbook version almost exactly, and I don’t want to steal anyone’s creativity, but I would like to share the spice marinade. This smelled unbelievably good. Seriously. I’m going to make this up separately as a marinade for meats, since it was just so damned good on its own. And quite quick and easy to make!

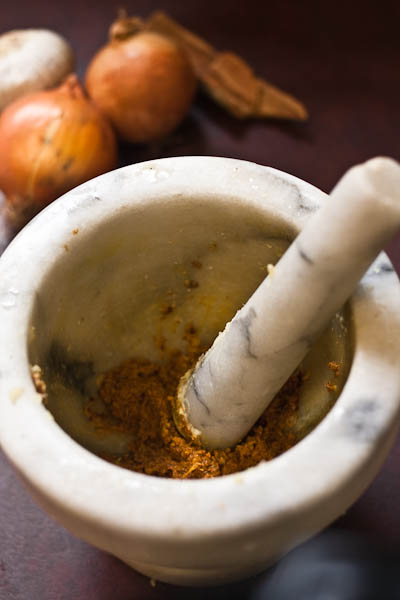
I prepared this in my mortar and pestle, since it was quite straightforward,  and I like pounding things with rocks. If you don’t own a mortar, or you just don’t like smashing things, feel free to use a food processor or spice grinder.

Toasted Coriander & Ginger rub for tasty meats

(from Mangoes & Curry Leaves)

The secret with this is the toasted coriander – toasting it not only brings out its spicy, nutty fragrance, but adding it hot to the marinade seems to bring out the other ingredients as well – especially the ginger.

Ginger & Toasted Coriander Marinade

This went together really easily and quickly, and smelt amazing.

Ingredients

1 tablespoon of ginger, chopped roughly

1/2 teaspoon cayenne pepper (I used two dried chillies from a previous feedbag)

1 teaspoon of coriander seeds

1/2 teaspoon ground turmeric

1 teaspoon of sea salt

Method

Toast the coriander seeds in a dry frypan until fragrant. Pop the other ingredients into your mortar or food processor, then add the coriander seeds while still hot. Pound or blend until a rough paste, then rub on meat of choice. Leave at least an hour to marinate before cooking.

Easy, isn’t it! And it is so very, very fragrant and tasty – I’m hungry just thinking about it.

Ginger & Coconut Milk Goat Curry

Delicious, fresh goat curry

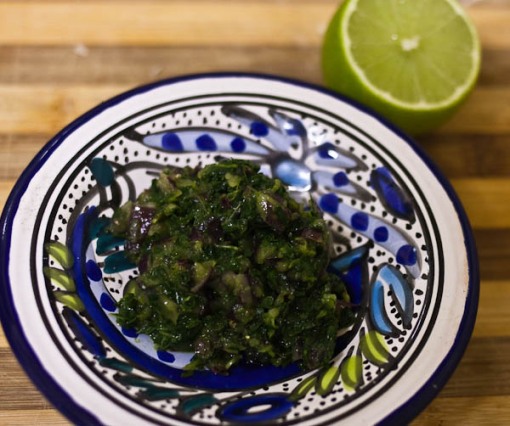
The rest of the curry recipe went together equally as well, as you can see from the finished curries. I served them with a fresh mint chutney, also from Mangoes & Curry Leaves, since I wanted something bright and fresh to bring out the flavours, and my poor mint from the last box was looking very wilted and forlorn on the bunch. It was all uber-tasty.

Fresh mint chutney

Tasty fresh mint chutney

I’ve heard from a few people that they’ve no idea what to do with the daikon radishes in this week’s feedbag, so here is Arwen’s handy how-to tips for daikon radish.

Daikon radish

You’ve all probably eaten daikon radish, unless you have a loathing for Japanese food – the grated strands of white stuff you get with sushi or sashimi is just grated daikon. It’s basically a very large, mild radish. Daikon is tasty sliced in salads, or you can cook it in stews as you would turnips. They do well with slow braising. Or you can slice it into thin rounds or semi-circles and quickly stir-fry it with other vegies.

Chinese turnip cake, a popular yumcha dish, can also be made with daikon.  JustHungry, one of my favourite Japanese food blogs, has a recipe for vegan turnip cake, but I haven’t actually cooked it for myself.

Maki, writer of JustHungry also points out you can dry daikon radish. She says to shred it into long thin shreds and put it in a basket in the sun for a few days. I don’t have a grater capable of doing long shreds, so I’ve sliced my radish as finely as possible, and it’s currently sitting in my front window on the lid of my bamboo steamer. Here’s hoping we actually get some dry weather for a few days!

Drying daikon

Drying daikon slices on my windowsill

Another easy use for daikon is Japanese style pickles, which are served alongside main course dishes. I pulled out my copy of  Easy Japanese Pickling (yes, I really do own a Japanese pickle cookbook), and ended up trying two different versions of daikon pickles.

Oolong tea daikon pickles

The recipe actually asked for Japanese green tea, or sencha tea, but I don’t actually have any, and I thought that the slight bitterness of daikon would actually go better with the earthy taste of oolong anyway, so I substituted.

Ingredients

1 tsp oolong tea

1/2 tsp salt

1/3 daikon radish, cut into matchsticks

Method

Add all ingredients to a small ziplock bag (you can use a normal plastic bag if you have to). Squeeze out the air and seal the bag, then squoosh gently with your hands until the daikon starts to look wet. Put aside for about an hour, then serve.

Oolong tea daikon pickles

Finished pickles - next time, I rinse the tea in boiling water to bring out the flavour more

Next time, I’ll pour some boiling water over the tea first, then drain it off quickly – I found the finished pickles didn’t have much of a tea taste. I’ll also use less salt – I’ve already adjusted the recipe here down, but it may need to drop to 1/4 teaspoon instead. Still, the pickles have a nice bite to them from the chilli.

Soy sauce daikon pickles

Kombu is dried kelp – the Japanese use it frequently as a flavouring, and to add umami. If you don’t have any, you should be able to skip it without losing much. Similarly, if you don’t have mirin, Japanese sweet cooking wine, you can substitute ½ teaspoon of sugar.

Ingredients

1/3 daikon radish, cut in half, then into segments, and scored lightly across the top

2 tablespoons soy sauce

1 tablespoon mirin

About 10cm of kombu, cut into little pieces with kitchen scissors

Method

Add the kombu (if using) to the soy and mirin, and set it aside while you slice the daikon. Then put your daikon gently into a ziplock bag, and add the kombu and marinade. Seal, and set aside for about an hour before serving.

Soy sauce daikon radish pickles

Finished soy sauce pickles. I sliced my pickle pieces into smaller chunks - they're quite tasty

If you’re really stuck for things to do with daikon (other than take it to the movies or invite it home to meet the parents), you can also grate it and add it to kimchi, Korean chilli pickled cabbage. This is made from wombok, Chinese cabbage, which we also got in this week’s box, and is surprisingly easy to make. I’ll be posting a recipe for that in a few days, so make sure to check back. I’m also planning on using my last daikon to make Japanese slow-cooked daikon with miso in a few days, so stay tuned for that as well.

This post was originally published over on Tree in Forest. It’s much more suitable for here, though, so I’ve moved it, with a few modifications. Apologies anyone who’s seen it before. To sweeten it for those who’ve seen it before, I’ve added in some new pictures. I’m also going to try and make a batch of the cherry unpronouncables from the class, so if any Feedbaggers  feel really hard-done-by, comment and I’ll try and save you one.

Fresh cherry schiaciatta

Fresh cherry unpronounceables (I'm told they're actually schiaciatta, but I prefer my version) - fellow Feedbaggers, comment if you're appalled by the double post and need to be bribed with one

At the end of last year, a (now ex-) workmate and I were given some gift vouchers. We found an interesting looking artisan breadmaking day course at Brasserie Bread, and since  at that time I’d just started dabbling around making sourdough (or really, getting a lot of flour all over the kitchen, and occasionally coming out with some rather dense loaves), we enrolled in the first vacant day we could find, and dragged a bunch of workmates with us.

So at the end of January, we got down & doughy, and it was such fun.

We were lucky enough to have Michael Klausen, one of the directors, as our tutor, and he was friendly, knowledgeable, and obviously passionate about his bread. He gave us the 10 steps of breadmaking, which I think we all forgot immediately, then we started kneading. Soon enough, the room was filled with the sounds of dough slapping the table, and the occasional friend showing off by trying to knead two rolls at once.

Dough sculptures

Some of us did show off a bit.

An amazing procession of different bread doughs came past, and we were shown how to mix them, how to shape them, how to knead them and how to tell when they were ready. In the middle we paused for some bread sampling, cheeses and white wine – very civilised after all our hard bready work.

Lisa and dough

Things did get a little messy at times.

And finally, we slid some cherry olive oil breads with an unpronouncable name into the oven – and out into our mouths.

The Brasserie Bread kindly set up a little table for me, since there was no earthly way I’d be able to stand up with everyone else, but even with that, and taking it as carefully as I could, I ended up pretty damned sore afterwards. Still, my bread went into the oven the next night, and came out looking respectable, if not fabulous, and tasting delicious. And I learnt a hell of a lot, and we each left carrying several bundles of freshly baked bread, and our own sourdough dough to take home and proof before baking.

Jenny and the large loaf

Jenny and her large loaf

All in all, such a fabulous day – and most of us are planning on going back. If nothing else, we still can’t remember the ten steps of baking! Me, I want to do their wholegrain baking course. I also want to go down there soon just to sit in the cafe, drink the coffee, and munch on as much tasty bread as I can fit into my tum. Anyone feel like an outing?