Simple


I shamelessly borrowed this recipe from Stonesoup, which is a fabulous Sydney-based foodie blog that I heartily recommend.

It’s so rare, though, that I come across a cake-style recipe that meets the criteria of simple, fast, tasty, and gluten-free, that I just had to share the results.

We realised a few years ago that M is somewhat gluten intolerant, which made baking much more complicated than it used to be. Often, gluten-free recipes involve 4 or 5 different types of flour, or they taste like sand – or both.

This is neither.

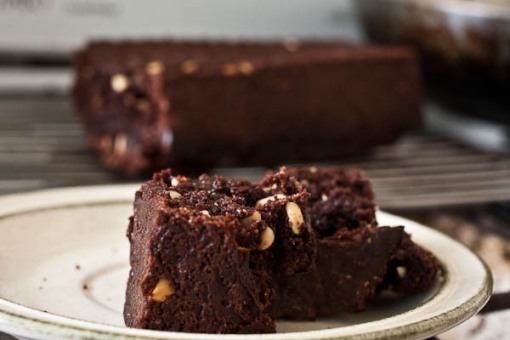
Gluten-free peanut butter chocolate brownies

Gluten-free peanut butter chocolate brownies - they taste even better than they look

The only changes I made to Jule’s recipe was that I used a commercial gluten-free self-raising flour, since that was what was in the cupboard, and we also included some Green & Blacks dark cooking chocolate. We also used raw sugar rather than brown sugar – again, that’s what was in the cupboard.

As you can see, they came out nicely.

Five minutes worth of prep, 30 minutes worth of baking, and thick, dense, peanut-chocolatey brownies, with the dark chocolate warm and melting in the centre. Our peanut butter had been in the fridge a little too long, so we’re going to have to bake another batch – just to check, you understand.

What are you waiting for? Recipe here.

What are you waiting for?

Quick sesame-soy omelette

Leftovers from the meal we were too tired to cook

It’s been a long day in a long week in a bad month. I was too tired to cook when I stumbled home, and M was out until late. So we decided to get takeaway.

Unfortunately, I was also too tired to remember to order takeaway. So by the time M got home,  it was late, we were both hungry, and neither of us could be bothered waiting for home delivery to show up.

So what to do?

There was brown rice in the rice cooker, some eggs & baby spinach leaves in the fridge, and the kimchi that I made back in June. Ten minutes later, we were sitting down to dinner.

Arwen’s Japanese-style omelette rice

Ingredients

4 eggs

1 tsp soy sauce

1 tsp sesame oil

Method

Break the eggs into a bowl and whisk with a fork. Stir in the soy sauce. Heat a frypan over high heat and add the sesame oil. Once you can smell the oil, add half the egg. Use the fork to move the cooked egg aside and let raw egg flow in. Once the first half is cooked, push it to the side of the pan, and cook the second half the same way. Cut into strips, and serve on the rice. I added a handful of baby spinach leaves, and a good amount of kimchi as well.

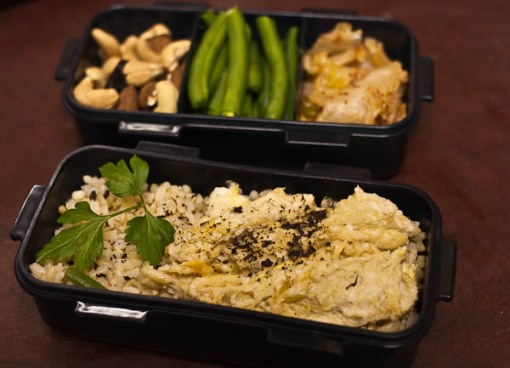
All in all, it was quick, hot, tasty, and nutritious. Of course, we were too hungry and tired to think of photographing it, so instead you have a lunch-bento  of the leftovers, still looking delicious for tomorrow.

And then I went to bed (after a quick pause to post this, of course).

Making your own pesto is much faster and easier than you'd expect

Most people don’t seem to think of pesto as a quick meal, unless you’re dolloping it out of a jar. Actually, though, fresh pesto is fast, simple, nutritious, and much, much tastier than any jar version you might have tried – even better than most restaurant versions.

I first encountered pesto from my Italian aunt, who used to babysit me until I was three years old. I then promptly forgot about it, of course, until a friend reintroduced me about sixteen or so years later. It surprised me to find out that most people think of pesto as something that comes out of jars. It’s actually very quick and easy to make at home – and so very much tastier than anything you’ll find in a jar.

There are many varients of pesto. I generally make a couple of different version, depending on what I have on hand. Basil pesto is my favourite, but you can also make very tasty versions from parsely or coriander. As well as using them on pasta, you can put dollops into soup, or on baked or grilled vegetables, into sandwiches, or as a salad dressing – or anywhere else you want a fresh tang of herbs and parmesan.

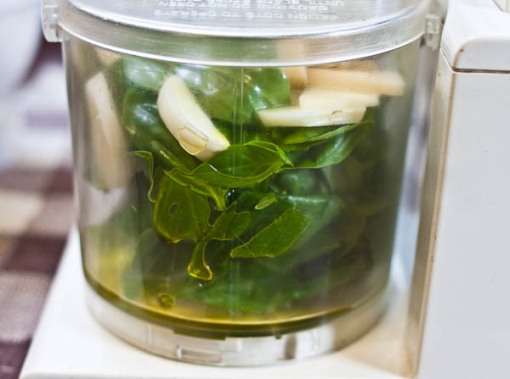
If you have a food processor, you can go from herbs on stalks to pesto in about 10 minutes, or less if you’re skipping the toasted pine nuts. If you only have a mortar and pestle, it may take a little longer – but some people think it’s even more delicious.

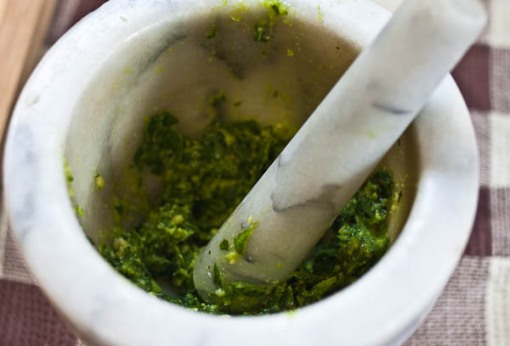
I’ve always read that pesto made in a mortar and pestle tastes much better than the food-processor made stuff. So just to keep things interesting, I made this pesto two ways. One in the food processor, the other in the mortar.

Basil pesto
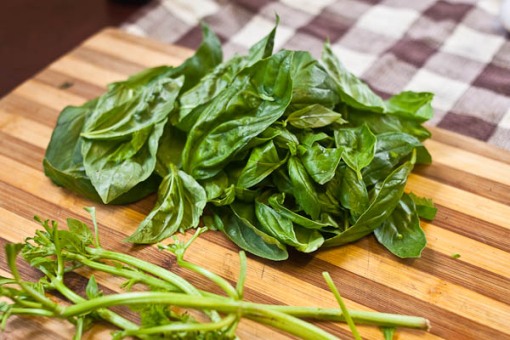
The fresher the basil, the better the pesto. Make sure you don’t use the flower heads in your basil; they’ll make your pesto bitter. And remember, all the quantities in this recipe are approximate, feel free to modify them to your taste.

Fresh basil

Make sure you leave out the flower heads, or you'll end up with bitter pesto

Ingredients
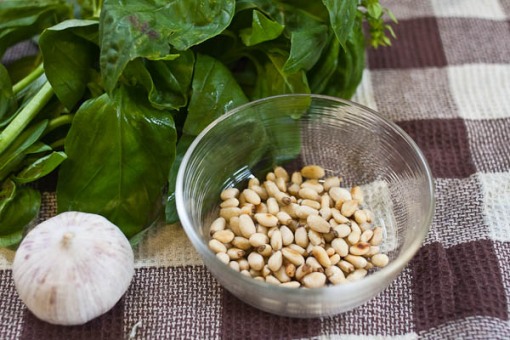
1 bunch of fresh basil
a handful of pine nuts
1/4 cup of parmesan, grated
1-2 cloves of garlic, peeled
about 2 tablespoons to 1/4 cup olive oil
Pinch of sea salt
Extra parmesan, to serve (optional)

Method
Pluck the leaves from the basil, and put in your food processor (or mortar). Toast the pinenuts in a dry frypan until they start to turn golden brown – watch them carefully as they can burn quickly. Pop them into the food processor as well, along with all the other ingredients (start with the smaller amount of olive oil). If you’re using a mortar and pestle, slice the garlic finely to make it easier to pound. Process your pesto until it becomes a very rough paste, either in a food processor or by giving it a good pounding with the pestle. Add more olive oil as needed.

Process until you get a chunky paste, adding more olive oil as needed

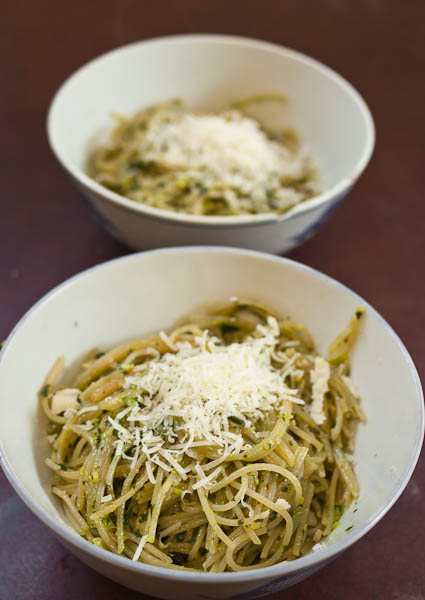
Serve tossed through fresh-cooked pasta, with a sprinkling of extra parmesan, if you feel like it.

Serves 2 hungry people.

Pasta with homemade pesto

Serve with a little extra parmesan, or just as is.

So which version is tastier? M and I sampled each, and the version made in the mortar won hands down. It had a more complex flavour, with the basil coming through much more clearly.

Pesto and pestle

The pesto made by hand had much more flavour and depth than the food processor batch

Does this mean I’ll be pounding my pesto from now on? I doubt it – it’s too labour-intensive for a fast meal. I may tip it into the mortar at the end, but the difference in flavour wasn’t large enough to make the extra effort worthwhile, except for extra-special occasions.

I’m told that some people have tried and liked the lamb shanks recipe – hooray! Be sure and post your experience if you’ve tried out any of the recipes here. I’m looking at the commenting system to see if I can make it a bit easier; I’m new at WordPress, so I’m still working out the options.

I’ve also been asked to post some more recipes. Whether that’s so there’s more tasties to try, or people would prefer not to read me meandering along about wholefoods, I’m not sure.

Either way, here’s an easy and simple recipe that I cooked last night. It’s vegetarian/vegan, unless you do as I did and add chicken breast at the end, and takes quite literally 5 minutes to prepare, then cooks itself. Well, if you own a rice cooker, anyway. There’s slightly more supervision involved if you don’t.

Personally, our rice cooker is our most-used kitchen item. 5 meals out of seven will involve rice, or sometimes quinoa, cooked in the rice cooker. And on weeknights it’s a life saver. Come home, pop rice in the rice cooker, then cook the rest of the meal when the rice is done – it’ll wait. Or, in the case of this recipe, chop for 5 minutes, toss things in the rice cooker, then eat when it’s done.

So simple.
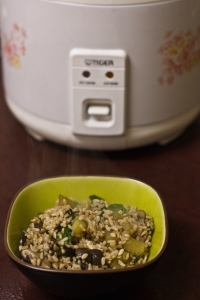
Chestnut & Shiitake rice

I really, really love my rice cooker - it cooks me meals like this!

I used packaged chestnuts for this – I usually pick up a bag or two when I’m in Chinatown, for snacks. You could also use dried chestnuts; I haven’t tried it myself, but I think the cooking time would be enough to rehydrate them. Or you can use fresh chestnuts if you want – the amount of effort it takes to roast and peel them usually means I just eat them on the spot, personally, but if you happen to have more than you can easily shovel in your gob, you can use them here.
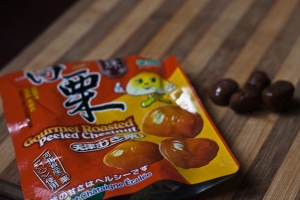
Pre-packaged chestnuts

These are the chestnuts I generally buy

If you don’t have chestnuts, you could substitute green peas or beans. It would change the final dish, and make it much less autumnal and sweet, but it would still be damn tasty.

Shiitake and Chestnut rice

Ingredients

1 rice-cooker cup of brown rice (or about 1/2 a metric cup, if you don’t have a rice cooker)

4-5 shiitake mushrooms

1 stick of celery

4-5 chestnuts

A couple of handfuls of baby spinach leaves, washed
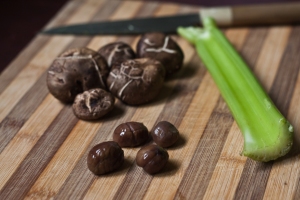
Prep time

Prep time!

Method

Chop the mushrooms, celery, and chestnuts – it doesn’t have to be too fine, just even slices. Put everything but the baby spinach into the ricecooker, or saucepan, and add the recommended amount of water. If you’re not using the rice cooker, add water to the depth of your second knuckle from the tip of your index finger. Cook normally. (if anyone needs instructions on cooking rice by absorption on the stove, comment and let me know – it’s pretty straight forward). Once cooked, stir the spinach leaves through.

Serve as is, or do as I did, and top with chicken breast, which I poached then quickly fried with a little soy sauce. Or you could add some Asian-style eggs quickly cooked in the wok with soy sauce and sesame oil.

If you want more flavour in your rice, you could partially or wholly replace the cooking water with chicken stock or Japanese dashi stock.
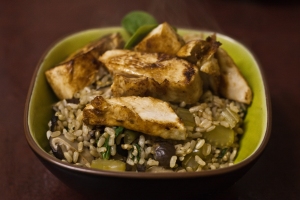
Chicken breast on chestnut & shiitake rice

Chestnut & shiitake rice with chicken breast

Serves 1 on its own, or 2 as part of a larger meal.

Enjoy cooking, and your food!