If you’ve ever eaten at a Korean restaurant, chances are you’ve eaten kimchi, the fermented chilli and Chinese cabbage pickle that tastes so, so much better than that description makes it sound. I love kimchi – I’ve been known to eat it by the spoonful. And, surprisingly enough, it’s pretty easy to make – well, this version is, anyway.
I’ve also discovered that some people haven’t encountered Chinese cabbage, or wombok, the main ingredient in most kimchi. It’s one of my favourite greens. It’s light and crisp, without the heavy sulfur tang of most Western varieties, but more robust than lettuce. It also lasts much better in the fridge than other Asian greens like bok choy or gai lan, and it cooks quickly in dishes like stirfries or stews. Chinese cabbage is one of the traditional ingredients in Japanese hotpots, too. For any Americans reading along, it seems to be known as Napa cabbage over there.
But if you’ve been staring at the remains of a Chinese cabbage in your fridge, wondering what on earth you’re going to do with it, tasty spicy bitey kimchi is a damn good option.
There are many, many different variations on kimchi. From ones that use different vegetables as the base, like daikon radish, or various greens, to different flavourings, like fish or soy sauce, or even fresh oysters. I like mine fairly basic, and didn’t happen to have any oysters lying around the house, so here is my version.
Arwen’s Simple Kimchi recipe
Korean chilli powder is normally a little milder than most others. I couldn’t find any when I went hunting through Asian supermarkets, so I just used normal chilli flakes, whizzed in my spice grinder until they were mostly powdered. If you’re using Korean powder, you may want to up your chilli quantity a little – or just leave it as it is for a slightly milder pickle.
The word ‘shmoosh’ appears frequently throughout this recipe. In case it’s not clear, I mean ‘give it a good squeezy mix with your hands’.
Ingredients
1/2 Chinese cabbage, cut into rough pieces
1/4 cup salt (don’t worry; it isn’t all ending up in the finished kimchi)
water
1/4 cup Korean chilli powder (or any other chilli powder)
3 spring onions, roughly sliced (optional)
2 teaspoons grated fresh ginger
2 teaspoons crushed fresh garlic (or 2 large cloves)
Method

Chopped cabbage, ready for brining
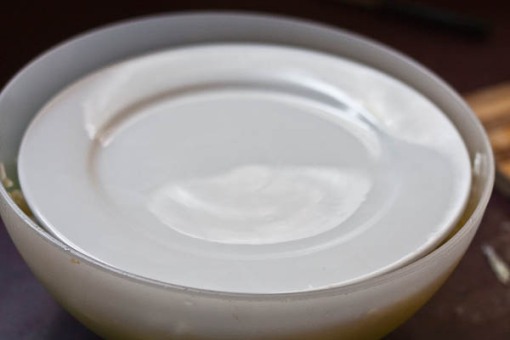
Pop the chopped Chinese cabbage into a non-metal bowl big enough to hold it comfortably. Dissolve the salt into about 2 cups of warm water, then pour the salty water over the cabbage. With clean hands, give the cabbage a good mix to make sure it’s all covered with the salt water, then pop a weight on top (I used a dinner plate) and leave it overnight (or for at least 4 hours) to brine.

I used a dinner plate as a weight for my brining cabbage
The next day, drain the brine off the cabbage, and rinse it well, preferably two or three times. Let it drain. Mix the chilli powder, garlic, and ginger with enough water to make a paste. Pop your cabbage pack in its bowl, and add the chilli paste and the chopped spring onions.

Before shmooshing
Now put some food-safe gloves on! This is important – you’re going to be doing more shmoosing, and grinding chilli into your skin burns, even if you don’t accidentally wipe your face with a chilli-hand. I used disposable latex gloves.

Give it a good mix and squeeze - and I mean it about the gloves!
Once you’re gloved up, mix the kimchi up well, giving it a good shmoosh as you go, to further break the cell walls in the cabbage and help the chilli marinade penetrate it.

And after shmooshing.
When mixed well, put the kimchi into your container (make sure you wash it well first!). Leave it out for 1 – 2 days to start to ferment, then pop it into the fridge. The longer you leave it, the more sour your final kimchi will be. You can eat it any time after it’s ready for the fridge; and it should last several months.
Note: it’s best to use a glass or ceramic jar to store your kimchi in, as the chilli can stain plastic. I had neither on hand, so I’ve resigned myself to a red-stained container.
The finished kimchi. Over the next few days, the liquid will go red, and the kimchi will get tastier and tastier.
I’ll make sure I post pictures of the final kimchi when it’s ready to eat, and hopefully a recipe as well.
Leave a comment